Easily access information from any database and publish it via a web service – Part 1 – The Database
OK, (probably) my two last post regarding my MMS 2011 sessions, if I haven’t missed something important ![]() .
.
To be able to make our Deployments more dynamic and as unattended as possible, we need to have all the information available, that we need to take decisions automatically . We typically use information from the local hardware, the customsettings.ini and maybe the MDT Database. If we are really advanced, we also make use of some web services like the Deployment Web Service to drive our deployment.
But what if the necessary information is somewhere else? Maybe you have already an Asset Management System or other Databases? Well, MDT can, as we all know, query almost any database. You just need to tell it how and what. But what if you can’t really access this database as your security guys simply won’t open Named pipes for that? Or you would just like to publish a subset of the available information or need to do some processing on the data first, before handing it out to the client?
Here again, web services might be an interesting choice. And in this post I’m showing you how you can easily access almost any relational database and publish this information via a web service. I will use Microsoft Visual Web Developer 2010 Express for this demo (download it for free at Microsoft) and as with the last couple posts, I will publish the complete source code to CodePlex. As Database, I simply use the MDT Database, but it could be any database, so see it just as a sample. Also this post shall just give ideas and cheer you on implementing your own stuff. ![]()
All right, lets start!
Create the project
Again, we first open Visual Studio and create a new Project. I chose the “ASP.Net Empty Web application” template to create one. This way we have nice, clean web based project to start from and don’t have any pre-configured junk in there. Just give it a useful name and a few seconds later, we are ready to start.
Connect to a Database
In a former Post I wrote already about using LINQ and the Entity Framework to query SMS/SCCM. And I will make again use of the Entity Framework to establish our connection to the database. Why would I want to do this? Well, the Entity Framework is an Object-Relational-Mapper. It will take a table/view/Stored Procedure from the database, create a new class based on it and automatically map them. So instead of having to deal with DataTables and columns and such stuff, we have “real” objects and properties, that (mostly)simply map to a column of a table with the same or different name. Yes, that’s very simplified but I’m not a developer and this post is also not targeted to developers ![]()
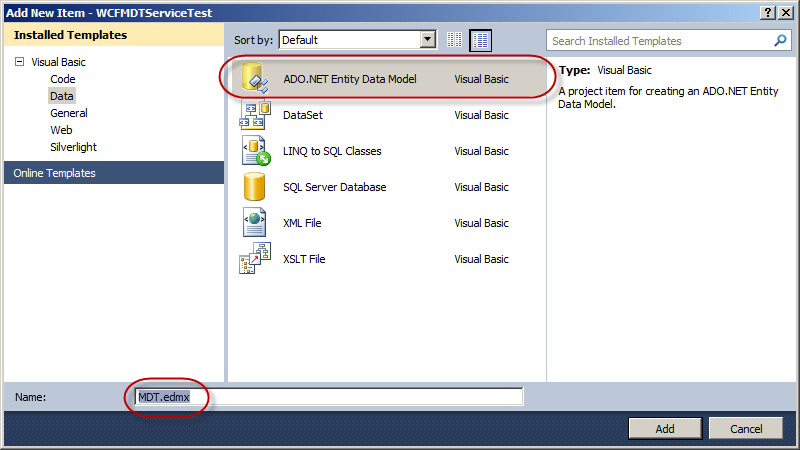
OK, lets add a new item to our almost empty project (Right-click on the project –> Add Item). We choose the “ADO.Net Entity Data Model” for this. Give it a useful name and click on Add.
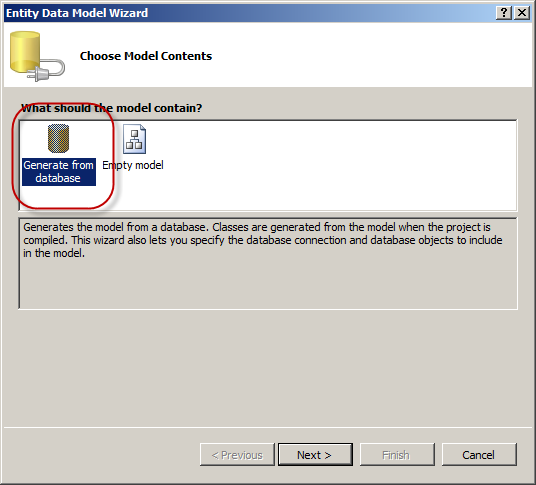
It will open a wizard, that asks us to either automatically generate a model for us or if we want to create our own. Well, as we are lazy, we will let it generate one.
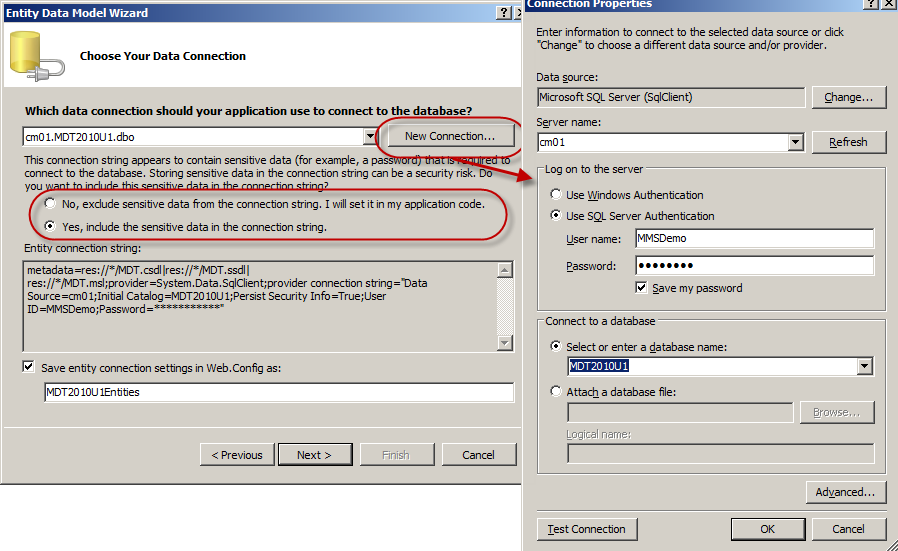
To enable the wizard to generate something, we need to tell it the database to connect to. To do so we need to specify the connection by either choose an existing one, or adding a new one by clicking on “New Connection” to connect to a new database.
The Note about storing sensitive information pops up only as I specified a SQL user with password to connect. It won’t show up if you use integrated security. Just configure it the way it’s appropriate for your environment. I simply prefer SQL accounts for such tasks.
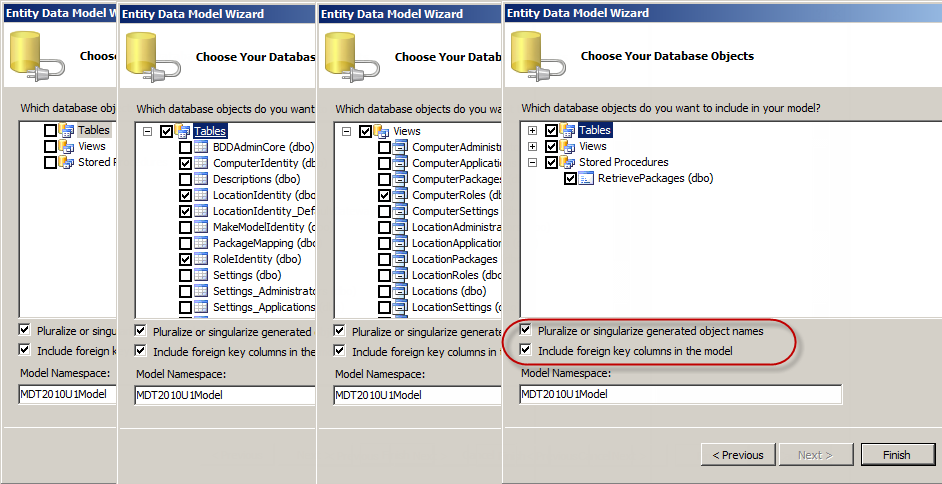
The wizard now connects to the database and returns a list of all Tables, Views and Stored Procedures. Select whatever you need from your database. I’d also suggest to check the “pluralize” option. The option for including the foreign key should be checked by default. You can also select just a few tables for now and come back later at any time to add more or even update existing tables, that e.g. got a new column.
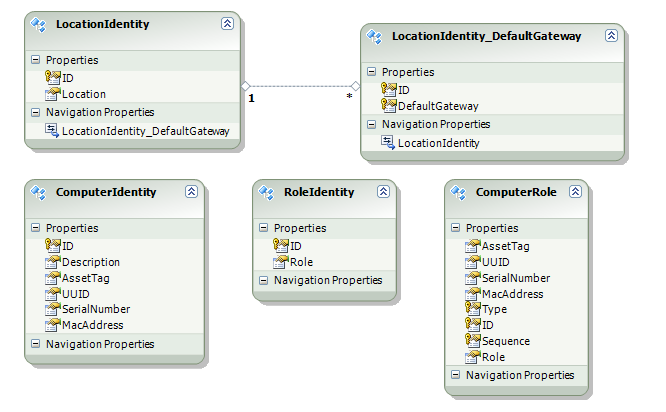
Clicking on Finish will now generate a Model based on the selected items. Next we will see a graphical representation of that model. Let’s have a quick look on a part of it.
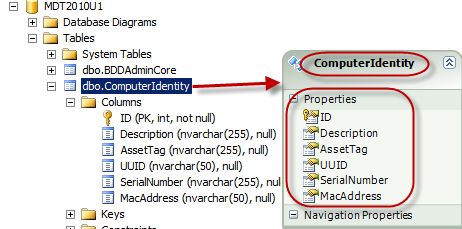
We will immediately see that the wizard took the table name and created a class (Entity) with the same name. And all the columns became properties of this entity.
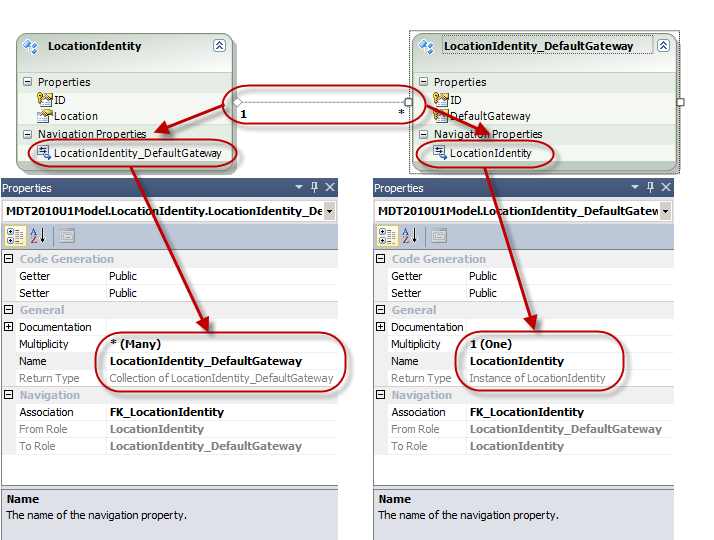
It even converted existing relationships between tables, as we can see between the LocationIdentity and LocationIdentity_Gateways entities. The connection is implemented with something called Navigation properties. The Location entity contains a list of Gateways and each Gateway entity contains a reference to exactly one location entity. They are called Navigation properties, as we can use them to easily navigate between them, as they work both ways.
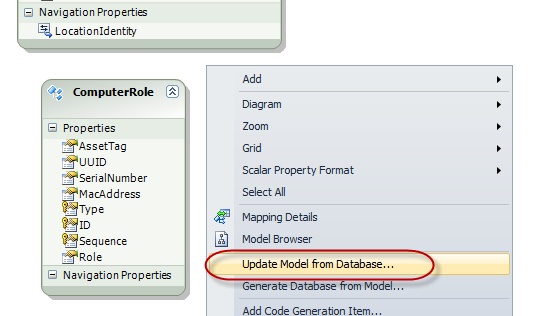
We could now implement some changes that are independent of the Database. For example we could give some properties a different name that seems more appropriate for our project, and they would still map to the correct column. But we can also right click somewhere on the background and click on “Update from Database” and this will open up the wizard again, we have seen before, giving us the chance to add more tables/views or update existing ones.
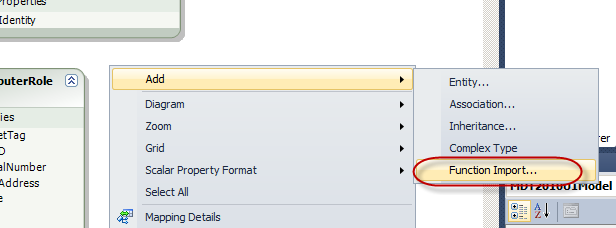
The last thing I would like to mention is how we can use Stored Procedures, as that could become a bit tricky sometimes. We have selected one Stored procedure already during the wizard, but sadly, that isn’t enough to be able to use it. We need to create a new function in our model and map it to that particular stored procedure. Often its enough to simply double-click on the Stored procedure (You can find it in the Model Explorer in the “Store” node) or right-click somewhere on the background of the model and choose Add –> Function Import …
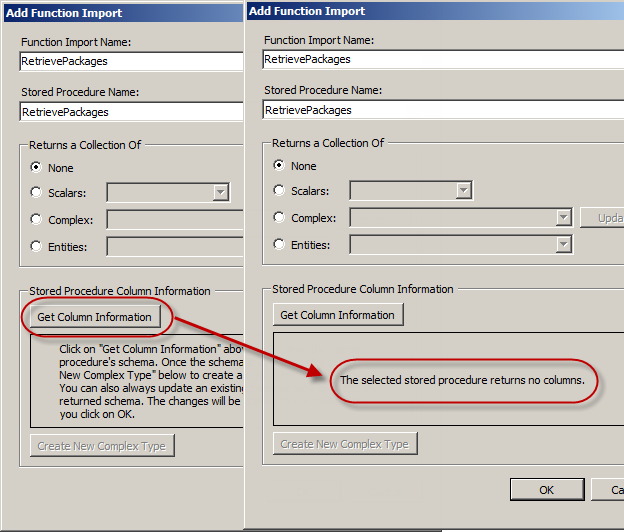
This opens a new wizard where we can specify a name for the function, the stored procedure it shall map to and (here comes the troubling part) what to do with the result of the Stored Procedure. Often the result maps quite easily to some scalar types (String, Integer, etc.) or an already existing Entity. If not, the Wizard gives us the possibility to get the column information and create a new complex type that we can use for this. However this doesn’t work all the time and as we expected already doesn’t do in our case. It says the store procedure doesn’t return any columns which isn’t really true but lets don’t argue with the wizard.
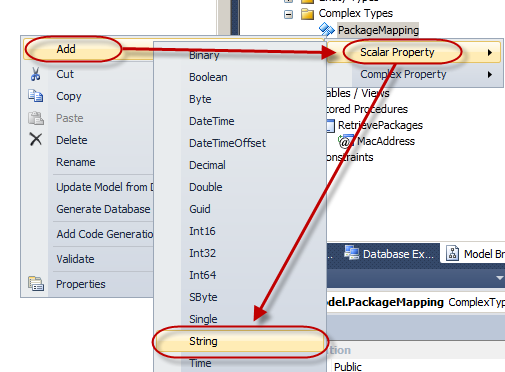
Now we need to create a complex type ourselves. Luckily this isn’t complicated at all. We simply right-click again somewhere on the background of the model and choose Add –> Complex Type
After giving it a name, we add a couple Properties by right-clicking on our new complex type and choose Add –> Scalar Property –> String
to add two new properties. “ARPName“ and “Packages“ as these are the names of the columns the stored procedure returns.
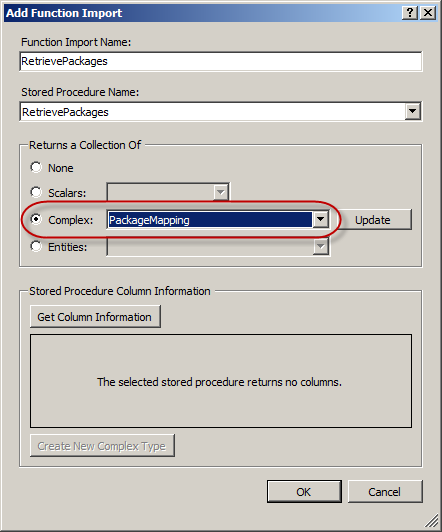
Now we can double-click again on the Stored Procedure “RetrievePackages” and now map the result to this new complex type
OK, we know now how to connect to a database and create a model from it that fits our needs. In the next post, we will jump right into the creation of our new Web Service to publish our new model.
The full source is published to CodePlex. If you download either the source or pre-compiled binaries, just make sure you adjust the connection string to Your MDT Database (see my last post Implementing a (very) simple Maintenance Mode in MDT LiteTouch for more information on how to adjust the Connection String.





1 Response
[…] we have configured the connection to our Database and created our model (see the last post for more details), we will jump now to the creation of our new Web […]