Michael Niehaus RIS style naming web service – Step by Step
One of the interestingly often asked question is how to properly name a computer. And it’s sometimes incredible to see how much time people can spend on that rather boring and actually not really helpful topic. Anyway, one solution a couple people really like is to have some kind of prefix and then just add a sequential number to it. In RIS deployments you have the option to do exactly that but with MDT this doesn’t work on default, forcing you to add your own bits to make this work. A couple people took this challenge already and published some working solutions:
Johan Arwidmark created a solution that is based on a simple Stored Procedure. Find the download and explanation at Generate Computernames in MDT 2010. You might also want to have a look on Rune Bakkens slightly extended version at http://runebelune.blogspot.com/2011/03/generate-computer-names-in-mdt-2010sccm.html. The beauty of this implementation is, that it works with what you have available already and it’s quite easy to extend and customize to your needs. Especially the post by Rune shows some interesting ideas. All it takes is somebody with some basic TSQL knowledge. The “bad” thing about it is, that the naming happens completely within MDT or better to say the database. So no verification if that name exists already in Active Directory etc.
And here the “Godfather of MDT” Michael Niehaus stepped in and wrote a “simple” web service that does the same, but is storing this information in Active Directory instead. Actually quite identical to what RIS/WDS is doing. It also creates the computer account and stores the UUID as a property. This way computers get the same name back if they were created already. On his blog he posted the complete source code on how to do that, but he actually didn’t supply a compiled version. He left it to the readers to do that. As a lot of people asked on how to do that exactly, I did a demo on this during the web service session I had together with Kenneth at MMS 2011. And I promised to publish this to CodePlex as well, so here you are ![]() . I’ll also go through what we did step-by-step, just to demonstrate, that taking such examples from the web, adjusting and getting them to work in your environment doesn’t need to be difficult.
. I’ll also go through what we did step-by-step, just to demonstrate, that taking such examples from the web, adjusting and getting them to work in your environment doesn’t need to be difficult.
Compiling the example code – Step by Step
- Get the source code from Michaels Blog Post (Link)
The example is written in C#. If you prefer VB.Net (as I do) over C# then just have it converted to VB.net first, using one of the freely available online converters. I normally use developerFusions converter for this. The following steps will cover C# and VB.Net if they differ at some aspect. - Open Visual Studio. You actually don’t need a full version for this. I used Visual Studio 2010 Web Developer Express in this demo, that can be downloaded for free at Microsoft. (Express Downloads).
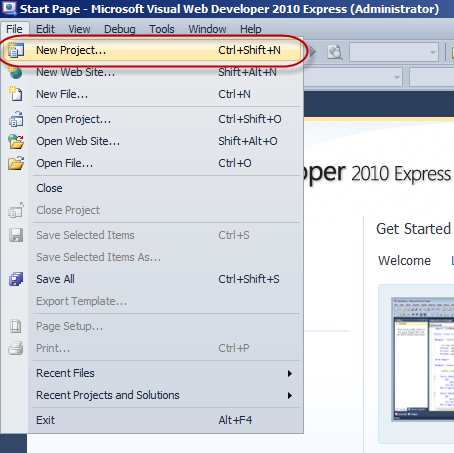
- Create a new ASP.Net Web Service Project. If you can’t find it in the list of project templates, just search for “web service”. Microsoft sometimes likes to “hide” the “older” stuff from us. Especially if they would like us to use some “newer” things like WCF in this case
 .
.
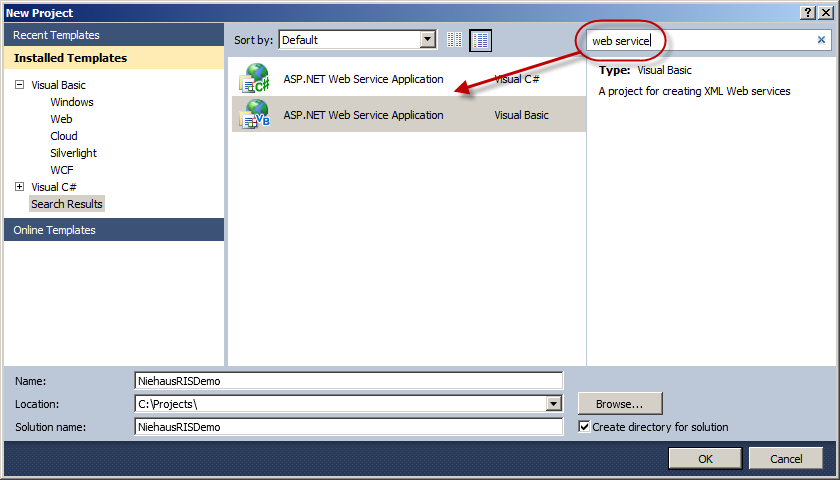
- Delete the default Service1.asmx (Optional).
- Add a new item “Web service” to the project (Right click on project –> Add Item –> Web Service) and give it the name “NameService.asmx”. Again, if you have problems finding it, just utilize the search.

- Mark all existing code and simply replace it with the code we got from Michaels Blog.
Tadaaa!!! We are done! …. Well, not really ![]()
Some required changes
Now we need to tweak some minor things to get it working:
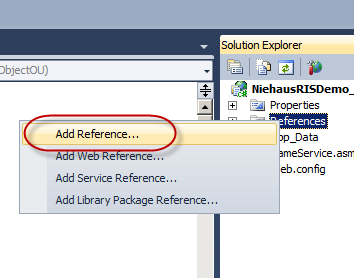
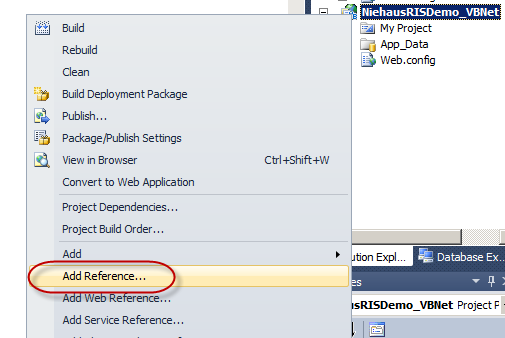
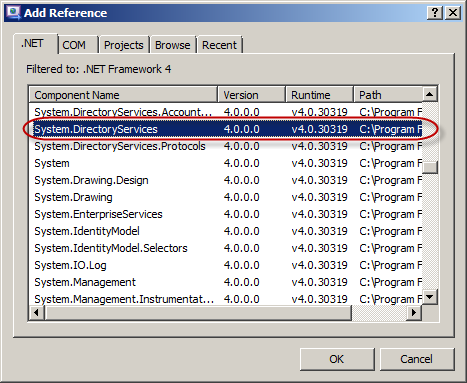
- We will see some issues with the System.DirectoryServices namespace. To solve this, we need to add a reference to Systems.DirectoryServices.
- On C# right-click on “References” –> Add Reference –> .NET –> System.DirectoryServices)
- On VB.Net you need to right-click the project –> Add Reference –> .NET –> System.DirectoryServices
|
C# |
VB.Net |
 |
 |
 |
 |
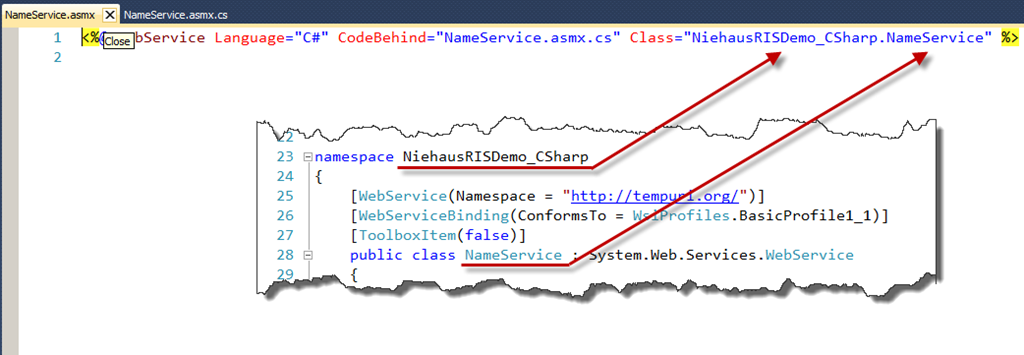
2. As our project has probably a different name as the one Michael used in his example, we need to adjust the namespace of our web service.
- On C# we just need to rename the Namespace to the name of our Project.
- On VB.Net we need to remove the namespace, as it uses the Project name as default namespace already.
|
C# |
VB.Net |
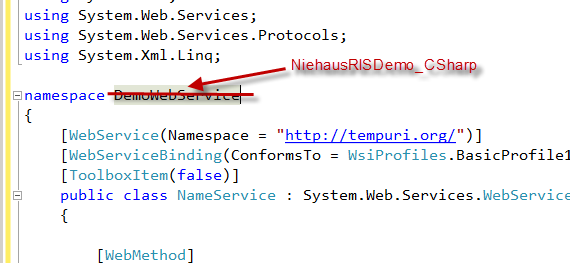 |
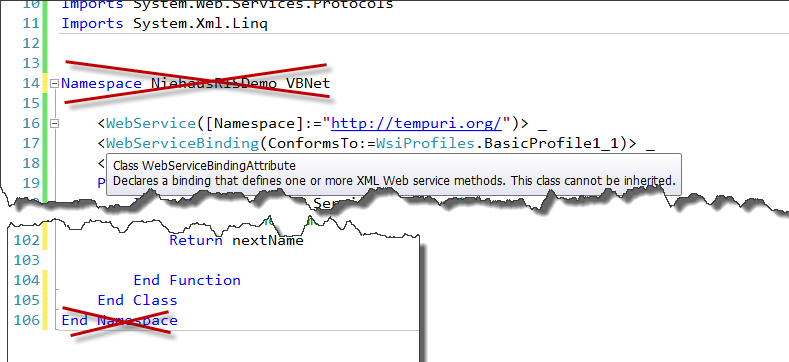 |
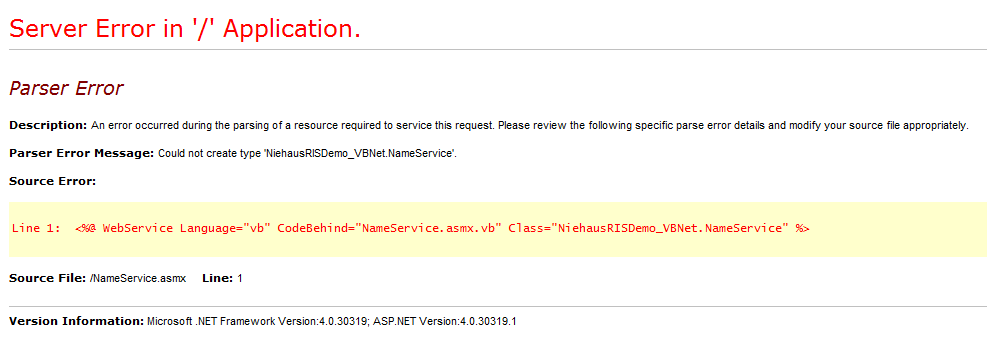
If you miss this or have a typo in the name, you will most probably see something like the following error, if you try to run the web service:
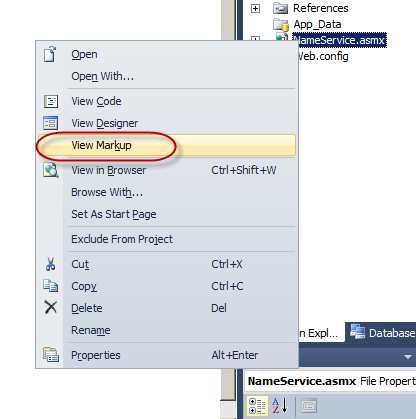
To verify the name used by the web service, right-click on the NameService.asmx –> View Markup and verify that the names match
Now it is already possible to execute and use the web service. However it has a minor “bug” as all computer accounts will be created as disabled. Not really that usable out-of-the-box. To solve this, we add another Active Directory property called “userAccountControl” to the new computer account and set the value to 4128.
|
C# |
VB.Net |
 |
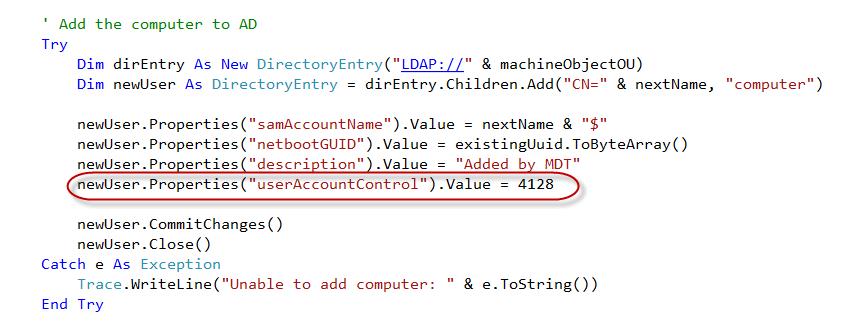 |
If we know click on “Start Debugging” (just press F5) we can test the web service using the built-in Development web server and generate new computer names.
For further information on how to integrate it into your Deployments, please have a look on Michaels Post as it covers that already in more detail.
Now we could add some additional logic like getting the default computer container if no OU has been specified (Tip: There are well known GUIDs for those containers), or move the computer to the specified OU if it is currently somewhere else, etc. But as this is just a demo I leave this to You. Feel free to implement your changes and if you would like to share them, I’ll happily post them to CodePlex so others can benefit from it as well.
Find the complete source for C# and VB.Net on CodePlex at this Download link. As a sidenote, the next version of the Deployment Webservice will have this function integrated already. With some more features for sure ![]()
As always, feel free to contact me with any ideas or comments you have. I really appreciate feedback, and try to respond as quick as possible.


1 Response
[…] – Michael Niehaus RIS style web service – Step by Step […]