Approving updates from ConfigMgr SCUP to WSUS
Even if I’m deploying images using ConfigMgr, I’m still a big fan of creating my reference images using MDT LiteTouch. It’s faster, easier to automate, easier to tweak and if using thin images, there is even not much duplication involved (but that’s a different discussion ![]() ). In such cases, I also typically use a standalone WSUS Server to have some control on what updates are being installed during the process. This WSUS instance is for this reference image process only.
). In such cases, I also typically use a standalone WSUS Server to have some control on what updates are being installed during the process. This WSUS instance is for this reference image process only.
However, most companies have a some kind of approval/verification process in place (or at least they should have something like this), to make sure, that those updates don’t interfere with any other software. Besides critical and security updates, there is very often a whole amount of additional updates, that are being approved and deployed throughout the environment. And those updates should maybe also included in the next iteration of the reference image.
As the list of approved updates, in the case of ConfigMgr, is stored in the Software Update Groups (ConfigMgr 2012) / Software Update Lists (ConfigMgrNow 2007), there is a need to synchronize this information with the standalone WSUS Server. Doing this manually can become a tedious task, so an automated way to approve all updates from a specific Software Update Group / Software Update List would be nice.
And as expected, someone already tackled this task. Aly Shivji from The Deployment Guys wrote a post about Approving Windows Updates in an MDT 2012 Standalone Environment from a ConfigMgr Software Update Point. Part of his solution is a PowerShell script that approves the updates in WSUS and a ConfigMgr extension that nicely integrates this script as a right-click action into the ConfigMgr console.
Later Chris Nackers wrote about this again and could convince Keith Garner, one of the main MDT developers, to tweak the script in a way, that one can use a different port than Port 80, which was a fixed setting in the original script.
So I only had to add some very few things to the brilliant work done so far:
– I added support for ConfigMgr 2012, as the custom extension was written for 2007 and doesn’t work with 2012. However, the download contains the files for both versions.
– I fixed a small bug in the script (actually from the very beginning) that caused it to not properly accept any license and with this an update with a license assigned couldn’t be approved.
– And finally for cases, where it isn’t possible to run custom PowerShell scripts directly on the site server or custom extensions aren’t allowed, I added the option to run the script manually with the appropriate namespace and Software Update Group / Software Update List name. I also added a second script that can be fed with a csv file containing the updates.
“Installation”
To get this working you have to
- Download the files from MDTCustomizations.Codeplex.com and expand them to a temporary folder.
- Copy the OSDLifeCycle folder to the %ProgramFiles(x86)% directory on your ConfigMgr site server.
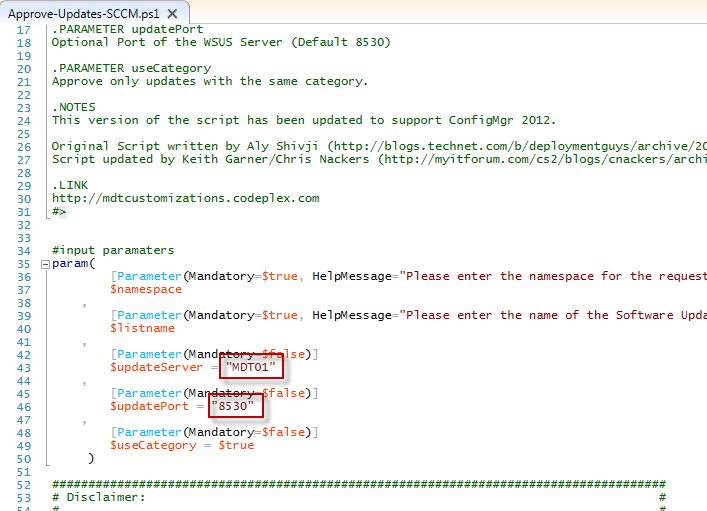
- Update the PowerShell script at OSDLifeCycleScriptsApprove-Updates-SCCM.ps1 with the appropriate WSUS Server name and port. If you run the script manually, you can also supply them as parameters. There is an additional parameter called “useCategory” which is set to $true on default. This will make sure that only updates, that have the same category will be approved. That might be helpful in cases, where an update shall be approved for a specific OS only. If you don’t want this to happen, change the default value to “$false”.

-
- On ConfigMgr 2007 copy the a7252c9e-3137-49a4-a8f2-13d17bb8abd0 folder to the following path in the ConfigMgr installation directory: e.g. Microsoft Configuration ManagerAdminUIXMLStorageExtensionsActions.
- On ConfigMgr 2012 copy the 2853886b-cce5-4ed4-af43-df69efb2e7d8 folder to the following path in the ConfigMgr installation directory: Microsoft Configuration ManagerAdminConsoleXMLStorageExtensionsActions
Now if you open the console (if it was open already, you have to close and re-open it again), go to the Software Library, expand Software Updates and select Software Update Groups. When selecting a Software Update Group you now have an additional option to “Approve updates in WSUS” in the menu and the right-click options.
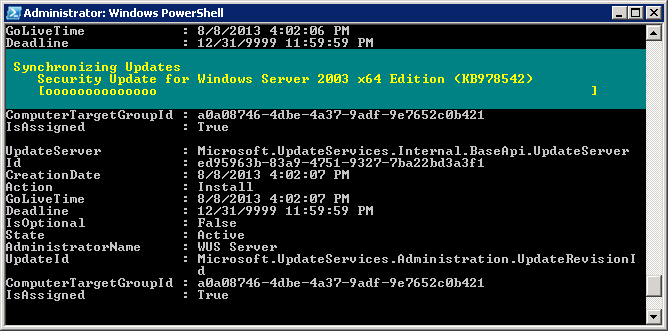
When you select “Approve updates in WSUS”, the PowerShell script will be executed and approve all the updates from the current Software Update Group / Software Update List in WSUS for all computers.
Please check the above mentioned blog posts for further information on how to use a WSUS Server to automatically install updates during the Litetouch deployment process.
Run script manually or use a csv list to approve
Sometimes it’s simply not possible to run a custom PowerShell script or add a custom extension on the site server. For such cases the script can also be called manually. To call the script manually, open a PowerShell command prompt, navigate to the OSDLifeCyclescripts folder and execute the following command:
|
1 |
.Approve-Updates-SCCM.ps1 -namespace "rootsmssite_XXX" -listname "Server Updates - Baseline" -updateServer "MDT01" |
namespace: is either rootsmssite_XXX (XXX being the site code) if you run the script on the site server or \CM01rootsmssite_XXX if calling from a remote server.
listname: localized Displayname of the Software Update Group / Software Update List
updateServer: WSUS Server name (optional. Default MDT01)
updatePort: WSUS Port (optional. Default 8530)
useCategory: Approve updates with the same category only (optional. Default $true)
For cases, where the updates have to be approved based on a csv list, an additional script has been added. Just call
|
1 |
.Approve-Updates-CSV.ps1 -csvlist "C:\ExportApprovedUpdates.csv" -updateServer "MDT01" |
csvlist: Name and path to the csv file containing the article number of the approved updates.
updateServer: WSUS Server name.
updatePort: WSUS Port (optional. Default 8530)
Troubleshooting
A couple things to note:
- If there is no “Approve Updates in WSUS” option available in the ConfigMgr console, make sure you copied the correct file (ConfigMgr 2007 or ConfigMgr 2012) to the correct location as mentioned above. Also make sure, that the Console needs to be closed while copying the xml file. If the console was open, close and re-open it again.
- I you get an error, that you can’t execute the script, make sure you set the appropriate Execution Policy for PowerShell to enable it to execute the script (http://technet.microsoft.com/en-us/library/hh849812.aspx). Be aware, that you need to do this for the x86 PowerShell environment (How to tell if PowerShell is 32-Bit or 64-Bit)!
- If you get an error, that the script file can’t be found, make sure that you copied it to the right location as mentioned before. If you copied the script to a different folder, make sure to adjust the path in the OSD.LifeCycle.ApproveInWSUS.xml file, which you can find in the GUID folder mentioned above.
- If it can’t connect to the WSUS Server, make sure, you updated the script with the correct WSUS Server name and port and that the firewall is configured correctly on the WSUS Server. Also make sure, that the current account has appropriate permission to approve the updates.
As always, the script is provided AS-IS without any explicit or implicit warranty of any kind. Be sure to test it thoroughly. I also appreciate any feedback.


Recent Comments